1、前言
本篇文章循序渐进带大家实现Vuex的主要功能,阅读前需要对vue的使用有基本的认识,学习过class了解其基本概念。
下面我们就开始吧
最终代码链接
github链接
2、准备测试数据
我们可以使用VueCli搭建一个Vuex的项目。这里简单的说一下命令
1
2
3
4
5
6
|
yarn global add @vue/cll
npm install -g @vue/cli
vue create vue-study
|
安装完后,直接启动该服务
接着我们可以先使用官方的 Vuex 先跑一个测试例子
编写文件 store/index.js
1
2
3
4
5
6
7
8
9
10
11
12
13
14
15
16
17
18
19
20
21
22
23
24
25
26
27
28
29
30
31
| import Vue from 'vue'
import Vuex from 'vuex'
Vue.use(Vuex)
export default new Vuex.Store({
state: {
name: 'layouwen',
age: 100,
},
mutations: {
changeName(state, newName) {
state.name = newName
},
changeAge(state, newAge) {
state.age = newAge
},
},
actions: {
changeAge(store, newAge) {
setTimeout(() => {
store.commit('changeAge', newAge)
}, 2000)
},
},
getters: {
info(state) {
return '我叫' + state.name + ',今年' + state.age
},
},
})
|
编辑 main.js 将 store 添加到 Vue 选项中
1
2
3
4
5
6
7
8
| import store from './store'
new Vue({
store,
render: h => h(App),
}).$mount('#app')
|
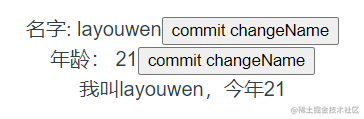
在 App.vue 中显示我们的数据
1
2
3
4
5
6
7
8
9
10
11
12
13
14
15
16
17
18
19
| <template>
<div id="app">
<div>
<span>名字: {{ $store.state.name }}</span>
<button @click="$store.commit('changeName', 'Avan')">
commit changeName
</button>
</div>
<div>
<span>年龄: {{ $store.state.age }}</span>
<button @click="$store.dispatch('changeAge', 21)">
commit changeName
</button>
</div>
<div>{{$store.getters.info}}</div>
</div>
</template>
// ...
|
现在我们就可以看到我们的数据了
下面我就开始实现自己的 Vuex 插件
3、实现插件注册
我们使用 Vuex 的时候是通过 use 进行注册,说明 Vuex 是一个插件。需要实现一个install方法
创建一个新文件实现我们自己的 Vuex
创建一个 Store 类,以及编写一个 install 方法,并定义一个变量保存 Vue,并在 this 中写一下假数据,
src/avuex.js
1
2
3
4
5
6
7
8
9
10
11
12
13
14
15
16
17
18
19
20
21
22
23
24
25
26
27
|
let Vue
class Store {
constructor() {
this.state = {
name: 'layouwen',
age: 100,
}
this.getters = {
info: '我是' + this.state.name + ',今年' + this.state.age,
}
}
}
function install(_Vue) {
Vue = _Vue
Vue.mixin({
beforeCreate() {
if (this.$options.store) Vue.prototype.$store = this.$options.store
},
})
}
export default { Store, install }
|
在 store/index.js 使用我们自己的 **avuex.js
1
2
|
import Vuex from '../avuex'
|
回到页面,看看是否正常显示。如果显示成功了,证明插件成功注册
在 Vue.use(Vuex) 时,Vue会自动调用 install 方案。
使用mixin,将我们在Vue选项中的store实例,挂载到原型上
我们就可以在Vue实例中,通过 this.$store 使用
4、实现state
我们在 store/index 中 new Store 的时候,传入了我们的初始化数据,我们需要将这些数据挂载到 store 实例中
avuex.js
1
2
3
4
5
6
7
8
| class Store {
constructor(options) {
this.state = options.state
this.$mutations = options.mutations
this.$actions = options.actions
this.getters = options.getters
}
}
|
现在发现,我们页面显示的数据有点问题,原因是我们getter是一个计算属性,应该返回的时候函数的结果。这里我们先放一下,先实现一下state的响应数据,有几套方案,比如使用Vue的工具函数,Vue.util.defineReactive 或者直接使用new Vue创建一个响应式data。我们这里采用后者。
1
2
3
4
5
6
7
8
9
10
11
12
13
14
15
16
17
| class Store {
constructor(options) {
this._vm = new Vue({
data() {
return {
$$state: options.state,
}
},
})
this.$mutations = options.mutations
this.$actions = options.actions
this.getters = options.getters
}
get state() {
return this._vm.$data.$$state
}
}
|
现在回到页面发现正常显示
通过 new Vue创建响应式对象复制给 _vm 接着通过 get 当使用 this.state 的时候。我们获取 _vm.$data.$$state 的数据,也就是我们通过new Vue 创建出来的响应式 state
5、实现commit
在 Vuex 中,我们修改数据是通过 this.$store.commit('mutations对应的名称', 需要的数据) 来进行数据的变更。所以我们需要在 Store 实例中实现一个 commit 方法
1
2
3
4
5
6
7
8
| commit(type, payload) {
const entry = this.$mutations[type]
if (!entry) {
console.error('mutation does not exist')
return
}
entry(this.state, payload)
}
|
回到页面。此时我们已经可以使用 commit changeName 修改 state.name 页面并响应了修改
在调用 commit 时会传入 type 和 payload 两个参数
通过type查找我们在new Store中传进来的 mutations 是否有对应的函数
有的话将 state 和 payload 传过去
6、实现dispatch
一般同步时,使用 commit 进行数据的修改,在异步操作时,将代码写到 actions 中。使用 dispatch 进行修改。所以我们现在实现一个 dispatch 来使用 actions 中的方法。实现方法同 commit。
1
2
3
4
5
6
7
8
| dispatch(type, payload) {
const entry = this.$actions[type]
if (!entry) {
console.error('action does not exist')
return
}
entry(this, payload)
}
|
此时回到页面,我们也可以正常使用 dispatch changeAge
实现原理同 commit 一致
在action参数接收中,第一个参数是store实例,所以我们需要把this传过去
7、绑定commit和dispatch中的this
在平时使用 commit 和 dispatch 中,难免会出现 this 指向丢失的情况。为了方便使用者使用。我们在 Store 的构造方法中将 this 绑定死 store 实例
1
2
3
4
5
6
7
8
| class Store {
constructor(options) {
this.commit = this.commit.bind(this)
this.dispatch = this.dispatch.bind(this)
}
|
8、实现getters
我们可以借用 Vue 实例上的 computed 计算属性实现 getter,使用 Object.defineProperty 实现当我们访问 this.$store.getter 的时候,访问的是我们 Vue 实例中的 computed。所以我们得将 getters 选项映射出一个新的 computed 变量接收,因为 computed 的函数不可以接收参数,所以我们通过高阶函数,返回我们 getters 中函数的返回结果。再将这个映射出来的 computed 变量,赋值到Vue实例中的computed。
1
2
3
4
5
6
7
8
9
10
11
12
13
14
15
16
17
18
19
20
21
22
23
24
25
26
27
28
| class Store {
constructor(options) {
this.getters = {}
this._wrapperGetters = options.getters
const computed = {}
Object.keys(this._wrapperGetters).forEach(key => {
const store = this
computed[key] = function() {
return store._wrapperGetters[key](store.state)
}
Object.defineProperty(store.getters, key, {
get() {
return store._vm[key]
},
})
})
this._vm = new Vue({
data() {
return {
$$state: options.state,
}
},
computed,
})
}
}
|
回到页面,我们已经能正常使用 getters.info。当 name 或者 age 改变的时候,会自动进行响应
End 最终效果