1、前言
本篇文章循序渐进带大家实现VueRouter的实现原理,阅读前需要对vue的使用有基本的认识,学习过class了解其基本概念。
实现注意点:
- 如何注册插件
- 实现router-view和router-link两个组件
- 如何根据当前路由显示对应组件
- 路由切换时如何更新组件
- 嵌套路由如何实现
带着这些问题下面我们就开始一步一步的实现
最终代码链接
github 链接
2、准备测试数据
我们可以使用VueCli搭建一个VueRouter的项目。这里简单的说一下命令
1
2
3
4
5
6
|
yarn global add @vue/cll
npm install -g @vue/cli
vue create vue-router-study
|
安装完后,直接启动该服务
1
2
| cd vue-router-study
yarn serve
|
接着我们可以先使用官方的 vue-router 先跑一个测试例子
编写文件 router/index.js
1
2
3
4
5
6
7
8
9
10
11
12
13
14
15
16
17
18
| import Vue from 'vue'
import VueRouter from 'vue-router'
Vue.use(VueRouter)
export default new VueRouter({
routes: [
{
path: '/',
component: () => import('../components/HelloWorld.vue'),
},
{
path: '/a',
component: () => import('../components/A.vue'),
children: [{ path: '/a/b', component: () => import('../components/B.vue') }],
},
],
})
|
编辑 main.js 将 router 添加到 Vue 选项中
1
2
3
4
5
6
7
8
| import router from './router'
new Vue({
router,
render: h => h(App),
}).$mount('#app')
|
在 App.vue 中显示我们的数据
1
2
3
4
5
6
7
8
9
10
11
12
13
14
15
16
| <template>
<div id="app">
<div>
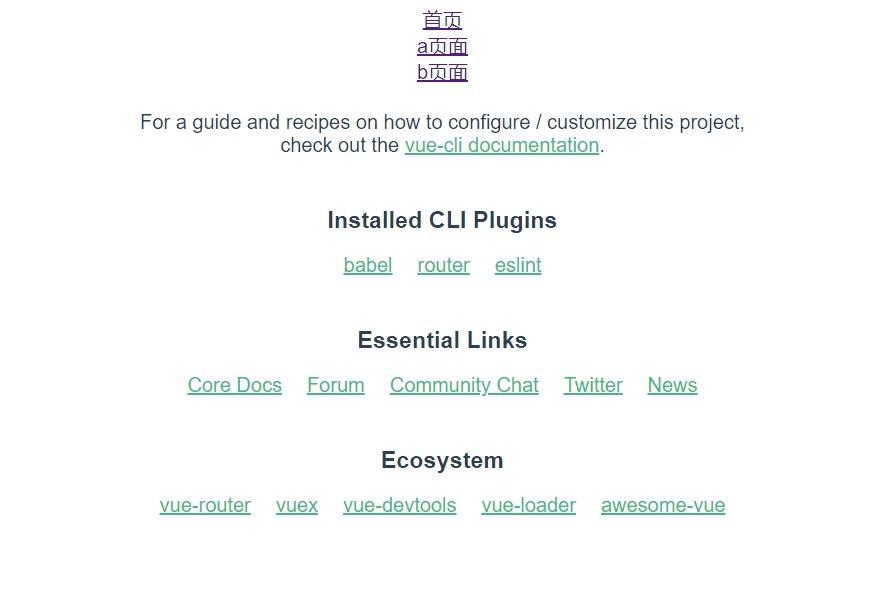
<router-link to="/">首页</router-link>
</div>
<div>
<router-link to="/a">a页面</router-link>
</div>
<div>
<router-link to="/a/b">b页面</router-link>
</div>
<router-view></router-view>
</div>
</template>
// ...
|
创建两个组件 A.vue 和 B.vue
components/A.vue
1
2
3
4
5
6
7
8
9
10
11
12
13
14
| <template>
<div>
我是A组件
<div>
<router-view></router-view>
</div>
</div>
</template>
<script>
export default {
name: "A"
};
</script>
|
componets/B.vue
1
2
3
4
5
6
7
8
9
10
11
| <template>
<div>
我是B页面
</div>
</template>
<script>
export default {
name: "B"
};
</script>
|
现在回到页面看看效果

下面我就开始实现自己的 vue-router 插件
3、实现插件注册
我们使用 VueRouter 的时候是通过 use 进行注册,说明 VueRouter 是一个插件。需要实现一个install方法
创建一个新文件实现我们自己的 VueRouter
创建一个 VueRouter 类,以及编写一个 install 方法,并定义一个变量保存 Vue
src/avue-router.js
1
2
3
4
5
6
7
8
9
10
11
12
13
14
| let Vue
class VueRouter {}
VueRouter.install = function(_Vue) {
Vue = _Vue
Vue.mixin({
beforeCreate() {
if (this.$options.router) Vue.prototype.$router = this.$options.router
},
})
}
export default VueRouter
|
在 router/index.js 使用我们自己的 avue-router.js
1
2
|
import VueRouter from '../avue-router'
|
回到页面,看看是否正常显示。如果显示成功了,证明插件成功注册
在 Vue.use(VueRouter) 时,Vue会自动调用 install 方案。
使用mixin,将我们在Vue选项中的router实例,挂载到原型上
我们就可以在Vue实例中,通过 this.$router 获得实例数据
4、实现 router-link 组件
通过 Vue 挂载全局组件,并将 props 拼接到 href 中,将默认插槽的值填充进去
1
2
3
4
5
6
7
8
9
10
11
12
13
14
15
16
17
18
19
20
21
22
23
| VueRouter.install = function(_Vue) {
Vue.component('router-link', {
props: {
to: {
type: String,
require: true,
},
},
render(h) {
return h(
'a',
{
attrs: {
href: '#' + this.to,
},
},
this.$slots.default
)
},
})
}
|
现在回到页面,router-link 已经正常显示。
5、实现 router-view 组件
需要声明一个响应式的变量 current 保存当前的 hash 路径。router-view 组件根据这个路径匹配 routes 表中对应的组件,显示出来。并监听 hashchange 在路径更新的时候,更新 current 的路径。
1
2
3
4
5
6
7
8
9
10
11
12
13
14
15
16
17
18
19
20
21
22
23
24
25
26
27
|
class VueRouter {
constructor(options) {
this.$options = options
Vue.util.defineReactive(this, 'current', window.location.hash.slice(1) || '/')
addEventListener('hashchange', this.onHashChange.bind(this))
addEventListener('load', this.onHashChange.bind(this))
}
onHashChange() {
this.current = window.location.hash.slice(1) || '/'
}
}
VueRouter.install = function(_Vue) {
Vue.component('router-view', {
render(h) {
let component = null
const route = this.$router.$options.routes.filter(route => route.path === this.$router.current)[0]
if (route) component = route.component
return h(component)
},
})
}
|
因为此刻我们没有实现嵌套路由,所以需要先把 A.vue 中的 router-view 注释掉,否则会造成死循环
components/A.vue
1
2
3
4
5
6
7
8
9
10
11
12
13
14
| <template>
<div>
我是A组件
<div>
</div>
</div>
</template>
<script>
export default {
name: "A"
};
</script>
|
现在回到页面,我们发现可以使用 router-link 切换页面了。
5.1 实现嵌套路由
我们参考一下官方的写法
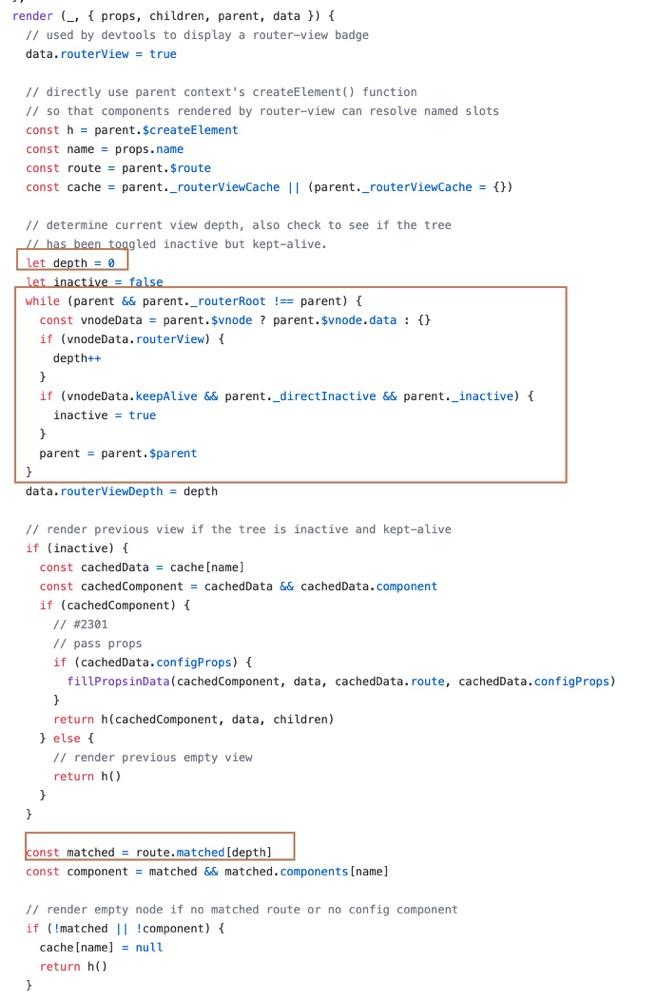
可以看出,他给每个 router-view 组件定义了个 depth 的变量确定它的深度,并且有个 matched 数组,记录当前路径的对应路由数组。
比如我们现在的 hash 地址为 /a/b 那 matched 应该为
1
2
3
4
5
6
7
8
9
10
11
| let matched = [
{
path: '/a',
component: () => import('../components/A.vue'),
children: [{ path: '/a/b', component: () => import('../components/B.vue') }],
},
{
path: '/a/b',
component: () => import('../components/B.vue'),
},
]
|
现在我们在 VueRouter 类中实现 matched 方法。通过递归 route 表。收集当前路径的所有 route 数组。
1
2
3
4
5
6
7
8
9
10
11
12
13
14
15
16
17
18
19
| class VueRouter {
match (routes) {
routes = routes || this.$options.routes
for (const route of routes) {
if (route.path === '/' && this.current === '/') {
this.matched.push(route)
return
}
if (route.path !== '/' && this.current.indexOf(route.path) !== -1) {
this.matched.push(route)
if (route.children) this.match(route.children)
}
}
}
}
|
接着我们要改写 route-view 组件。在每个 route-view 组件中添加 routerView 的属性,以此判断是否为 router-view 组件。从当前实例出发,向上循环,计算出当前组件,是在第几层。保存该值到 depth 变量中。然后再根据 matched 表选择对应层数的 route 获取该表的 component 显示即可。
1
2
3
4
5
6
7
8
9
10
11
12
13
14
15
16
17
18
19
20
21
22
| VueRouter.install = function (_Vue) {
Vue.component('router-view', {
render (h) {
this.$vnode.data.routerView = true
let depth = 0
let parent = this.$parent
while (parent) {
const vnodeData = parent.$vnode && parent.$vnode.data
if (vnodeData && vnodeData.routerView) {
depth++
}
parent = parent.$parent
}
let component = null
const route = this.$router.matched[depth]
if (route) component = route.component
return h(component)
}
})
}
|
现在我们可以解开 components/A.vue 中 router-view 中的注释。显示正常~
End 最终效果