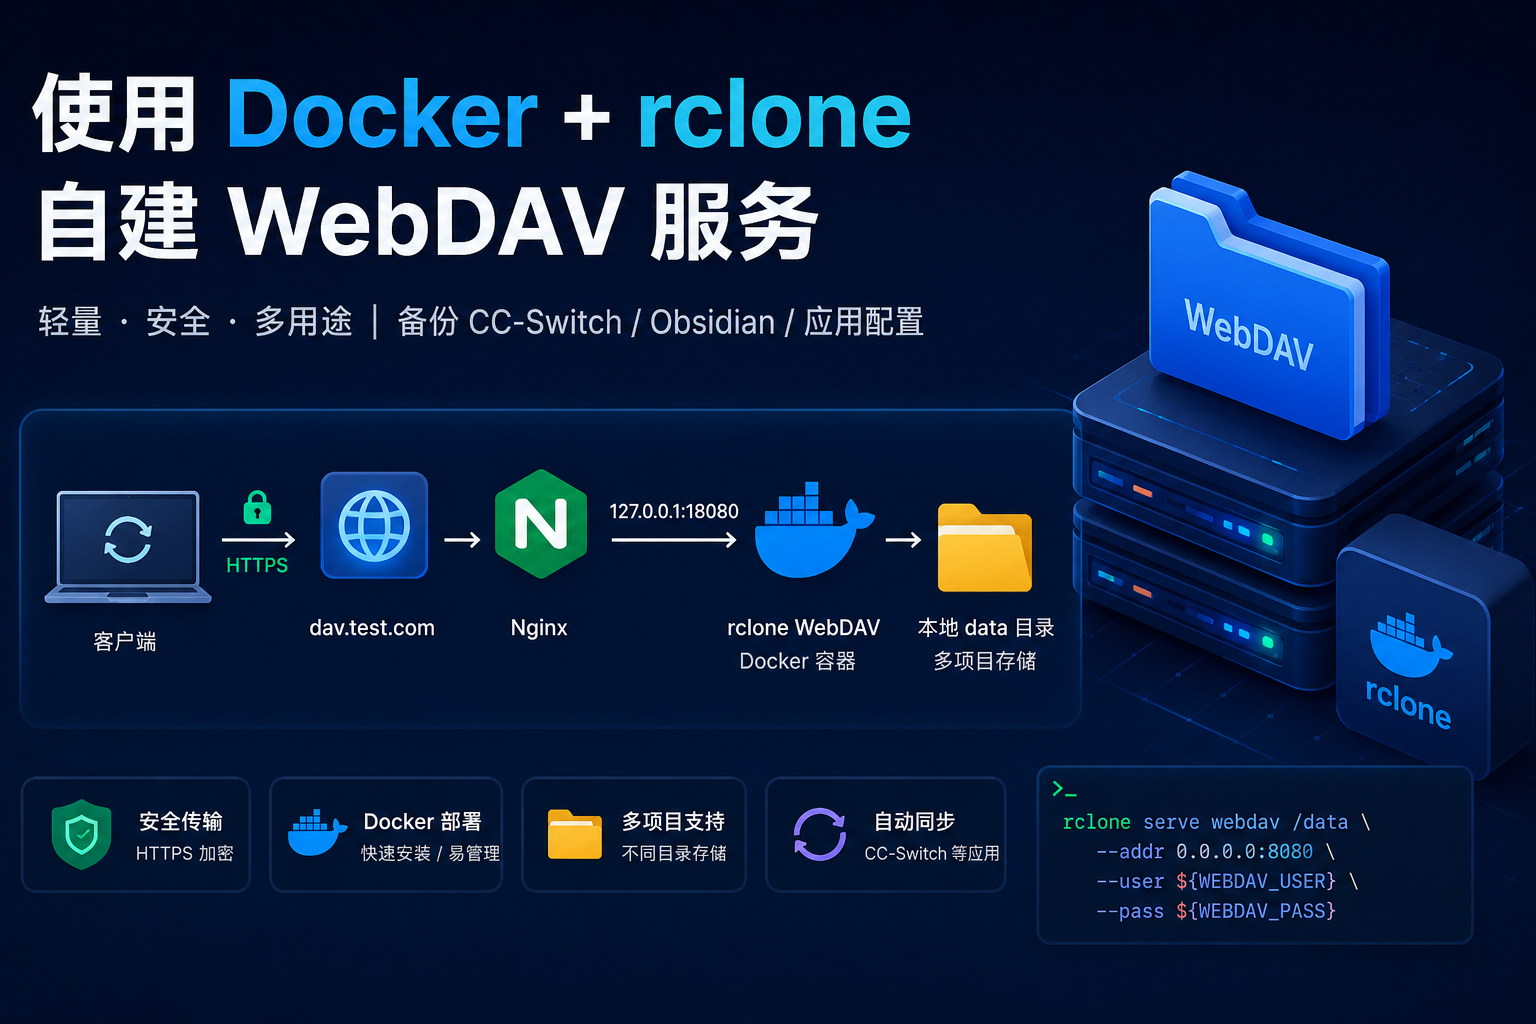
使用 Docker + rclone 自建 WebDAV
适合用于备份 CC-Switch、Obsidian、应用配置等小型数据。
整体链路:
1
2
3
4
5
6
7
| 客户端
↓ HTTPS
dav.test.com
↓ Nginx
127.0.0.1:18080
↓ rclone WebDAV
本地 data 目录
|
rclone 的 serve webdav 可以直接将本地目录作为 WebDAV 服务对外提供。
1. 创建目录
1
| mkdir -p webdav/data/cc-switch-sync
|
目录结构:
1
2
3
4
5
| webdav/
├── .env
├── docker-compose.yaml
└── data/
└── cc-switch-sync/
|
后续还可以继续增加其他项目:
1
2
| mkdir -p webdav/data/obsidian
mkdir -p webdav/data/app-config
|
2. 生成账号密码
生成随机密码:
创建环境变量文件:
写入:
1
2
| WEBDAV_USER=你的用户名
WEBDAV_PASS=刚刚生成的密码
|
限制文件权限:
3. 创建 Docker Compose
1
| vim webdav/docker-compose.yaml
|
写入:
1
2
3
4
5
6
7
8
9
10
11
12
13
14
15
16
17
18
19
20
21
22
23
24
| services:
webdav:
image: rclone/rclone:latest
container_name: webdav
restart: unless-stopped
command:
- serve
- webdav
- /data
- --addr
- 0.0.0.0:8080
- --user
- ${WEBDAV_USER}
- --pass
- ${WEBDAV_PASS}
- --log-level
- INFO
ports:
- "127.0.0.1:18080:8080"
volumes:
- ./data:/data
|
这里将宿主机的:
挂载到容器:
127.0.0.1:18080 只允许服务器本机访问,公网请求统一通过 Nginx 转发。
4. 启动 WebDAV
1
2
| cd webdav
docker compose up -d
|
查看状态:
查看日志:
1
| docker compose logs --tail=100 webdav
|
本机测试:
1
2
3
4
5
| curl -i \
-u '用户名:密码' \
-X PROPFIND \
-H 'Depth: 1' \
http://127.0.0.1:18080/
|
返回以下状态说明 WebDAV 正常:
1
| HTTP/1.1 207 Multi-Status
|
5. 准备 HTTPS 证书
推荐使用公共 CA 签发的证书,例如:
1
2
3
4
| Let's Encrypt
阿里云 SSL
腾讯云 SSL
51SSL
|
阿里: https://yundun.console.aliyun.com
51ssl: https://www.51ssl.com/
假设获得的证书文件为:
1
2
| dav.test.com.pem
dav.test.com.key
|
放入 Nginx 挂载的证书目录:
最终结构:
1
2
3
4
5
| nginx/conf.d/
├── cert/
│ ├── dav.test.com.pem
│ └── dav.test.com.key
└── webdav.conf
|
6. 配置 Nginx
创建配置:
1
| vim nginx/conf.d/webdav.conf
|
写入:
1
2
3
4
5
6
7
8
9
10
11
12
13
14
15
16
17
18
19
20
21
22
23
24
25
26
27
28
29
30
31
32
33
34
35
36
37
38
39
40
41
42
| server {
listen 80;
listen [::]:80;
server_name dav.test.com;
return 301 https://$host$request_uri;
}
server {
listen 443 ssl;
listen [::]:443 ssl;
server_name dav.test.com;
ssl_certificate /etc/nginx/conf.d/cert/dav.test.com.pem;
ssl_certificate_key /etc/nginx/conf.d/cert/dav.test.com.key;
ssl_protocols TLSv1.2 TLSv1.3;
ssl_session_cache shared:SSL:10m;
ssl_session_timeout 10m;
client_max_body_size 1g;
location / {
proxy_pass http://127.0.0.1:18080;
proxy_http_version 1.1;
proxy_set_header Host $host;
proxy_set_header X-Real-IP $remote_addr;
proxy_set_header X-Forwarded-For $proxy_add_x_forwarded_for;
proxy_set_header X-Forwarded-Proto https;
proxy_request_buffering off;
proxy_buffering off;
proxy_connect_timeout 30s;
proxy_send_timeout 600s;
proxy_read_timeout 600s;
}
}
|
Nginx 使用 proxy_pass 将 HTTPS 请求转发给本机 rclone 服务。
如果 Nginx 使用 Docker,需要确保以下目录已经挂载:
1
2
| volumes:
- ./conf.d:/etc/nginx/conf.d:ro
|
如果 Nginx 使用:
则可以直接访问:
7. 加载 Nginx 配置
检查配置:
1
| docker exec nginx nginx -t
|
重新加载:
1
| docker exec nginx nginx -s reload
|
测试 HTTPS WebDAV:
1
2
3
4
5
| curl -i \
-u '用户名:密码' \
-X PROPFIND \
-H 'Depth: 1' \
https://dav.test.com/
|
正常应返回:
1
| HTTP/1.1 207 Multi-Status
|
8. 配置 CC-Switch
在 CC-Switch 中填写:
1
2
3
4
5
6
| 服务商:自定义
WebDAV 服务器地址:https://dav.test.com/
WebDAV 账户:WEBDAV_USER
WebDAV 密码:WEBDAV_PASS
远程根目录:cc-switch-sync
同步配置名:default
|
第一次使用:
1
2
3
4
| 保存配置
→ 测试连接
→ 上传
→ 开启自动同步
|
数据最终保存在:
1
| webdav/data/cc-switch-sync/
|
9. 存放多个项目
一个 WebDAV 服务可以保存多个项目,只需要使用不同目录:
1
2
3
4
5
| data/
├── cc-switch-sync/
├── obsidian/
├── app-config/
└── server-backup/
|
对应地址:
1
2
3
4
| https://dav.test.com/cc-switch-sync/
https://dav.test.com/obsidian/
https://dav.test.com/app-config/
https://dav.test.com/server-backup/
|
所有目录共用同一套 WebDAV 用户名和密码。